Proper adjustment of ring and pinion gears is one of the most critical steps in achieving quiet, efficient, and long-lasting differential performance. Whether you are building a differential from scratch, replacing a worn gear set, or fine-tuning an aftermarket assembly, understanding how to correctly set up these gears determines not only power delivery but also the overall reliability of the drivetrain.
This article provides a complete, practical guide to adjusting differential gears, from understanding the basic geometry to performing precise measurements and identifying the ideal contact pattern.

Understanding Ring and Pinion Function
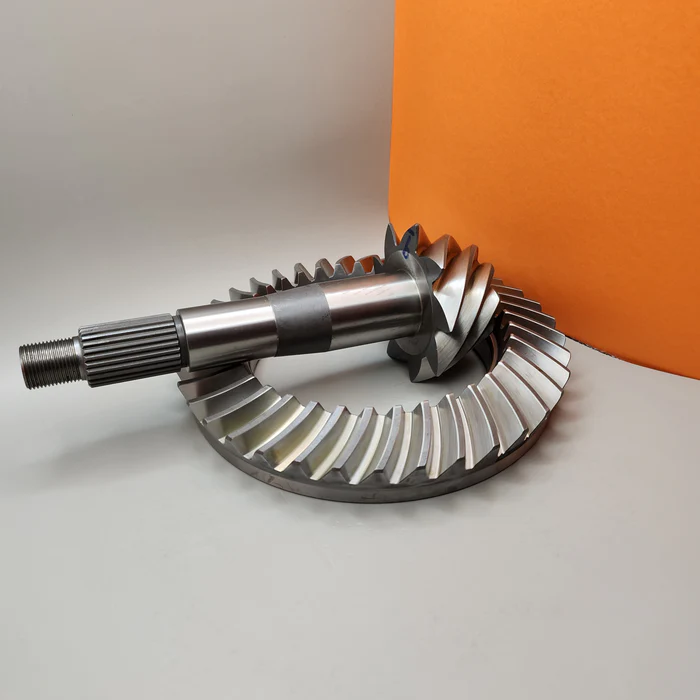
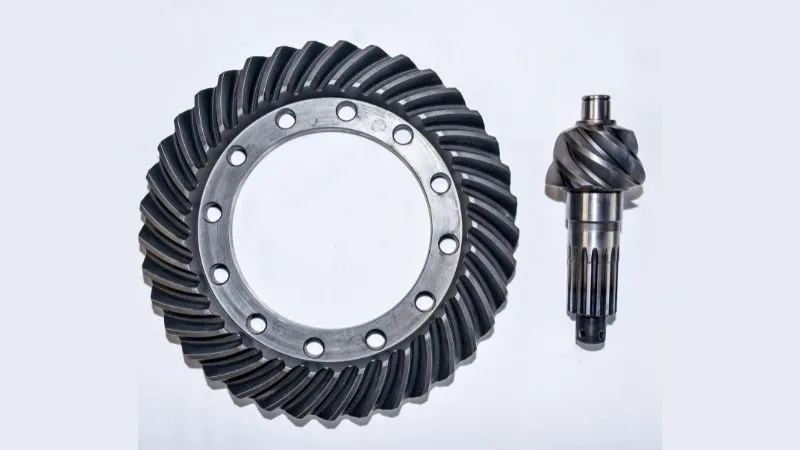
At the heart of every differential lies the ring and pinion gear set, which transfers torque from the driveshaft to the axles. The pinion gear, connected to the driveshaft, meshes with the larger ring gear attached to the differential carrier. Together, they change the direction of power flow and determine the gear ratio of the axle.
Because these gears operate under high torque and rotational speed, their alignment and mesh pattern must be extremely precise. Even small deviations can cause noise, vibration, excessive wear, and eventual gear failure. Therefore, adjustment is not just about assembly—it’s about achieving optimal geometry under load.
Preparation Before Adjustment
Before beginning the adjustment process, ensure that you have a clean, well-lit workspace and the necessary tools. Precision matters here; even a fraction of a millimeter can affect the final differential assembly and the proper pinion bearing preload, both of which are critical for optimal gear performance.
Essential Tools and Materials:
- Dial indicator with magnetic base
- Torque wrench
- Bearing puller or press
- Setup bearings (optional but recommended for checking pinion bearing preload)
- Gear marking compound
- Feeler gauges and calipers
- Pinion depth gauge (or a master housing gauge for best accuracy)
Components to Inspect:
- Ring and pinion gears (check for pitting or chipped teeth)
- Bearings and races (essential for consistent pinion bearing preload)
- Differential housing and carrier (critical for the overall differential assembly)
- Shims and preload adjusters
If any of these components show visible wear or damage, replace them before adjustment. Attempting to reuse worn parts can result in misleading measurements, improper mesh patterns, or incorrect pinion bearing preload, compromising the final differential assembly.
Step 1: Setting the Pinion Depth
Most gear sets have a pinion depth number etched on the pinion head, which represents the ideal distance from the face of the pinion to the centerline of the ring gear. Manufacturers typically specify this in thousandths of an inch or hundredths of a millimeter.
- “+2” indicates that the pinion should be installed 0.002 inches shallower than the standard depth. Adjust the shim thickness accordingly to achieve the correct tooth contact pattern. A negative marking (e.g., “–2”) means the pinion must be set deeper by that amount.
- “754” is the matched set number, showing that this pinion and its ring gear were factory-lapped as a pair to ensure precise fit and performance.
To adjust pinion depth:
- Install the pinion with its bearing and races, but without the crush sleeve or final torque preload.
- Use setup bearings if possible to allow easy adjustment.
- Measure the pinion depth using a gauge or calculate the variance from the factory marking.
- Add or remove shims behind the pinion bearing to achieve the desired depth.
Pinion depth is the foundation of the entire setup—every other adjustment builds upon this baseline.
Step 2: Establishing Pinion Bearing Preload
There are two common methods:
- Crush sleeve method: Tighten the pinion nut gradually until the sleeve compresses, then check rotational torque with an inch-pound torque wrench.
- Shim method: Add or remove shims until the correct bearing resistance is achieved.
Typical rotational torque for new bearings is around 15–25 in-lbs (1.7–2.8 Nm), though this varies by manufacturer. Once set, the pinion should rotate smoothly with consistent resistance.
Step 3: Installing the Differential Carrier and Ring Gear
With the pinion established, you can install the differential carrier with the ring gear attached. Before final assembly, torque all ring gear bolts to specification and apply thread locker if required.
Carrier bearings should also have proper preload to prevent movement during operation. This preload is achieved using carrier shims or adjuster nuts on either side of the carrier.
During installation:
- Ensure the carrier fits snugly within the housing.
- Use a pry bar or adjuster tool to eliminate play.
- Do not force the carrier in; if it requires excessive pressure, recheck your shim selection.
Step 4: Setting Backlash
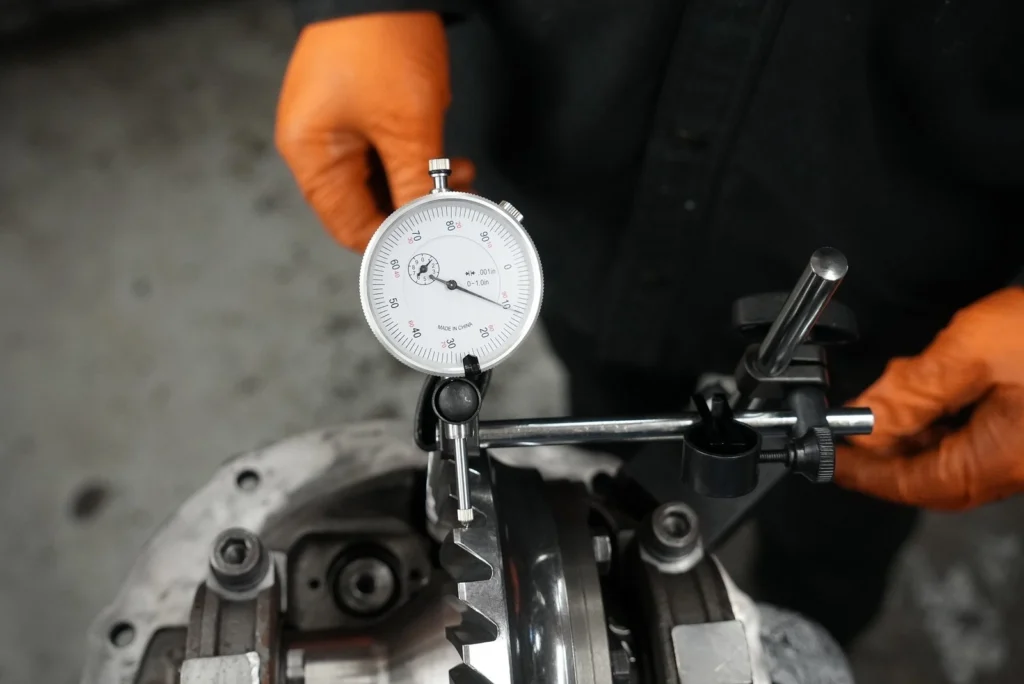
Backlash is the small amount of clearance between the ring and pinion gear teeth. It allows space for lubrication and compensates for thermal expansion during operation.
Measure backlash using a dial indicator positioned on a ring gear tooth. Rotate the ring gear back and forth while keeping the pinion stationary. Record the total movement.
Most gear manufacturers specify backlash between 0.006″–0.010″ (0.15–0.25 mm).
To adjust backlash:
- Move the ring gear closer to the pinion to decrease backlash.
- Move it away from the pinion to increase backlash.
Always maintain carrier bearing preload while making these changes—this ensures consistent and repeatable measurements.
Step 5: Checking the Contact Pattern
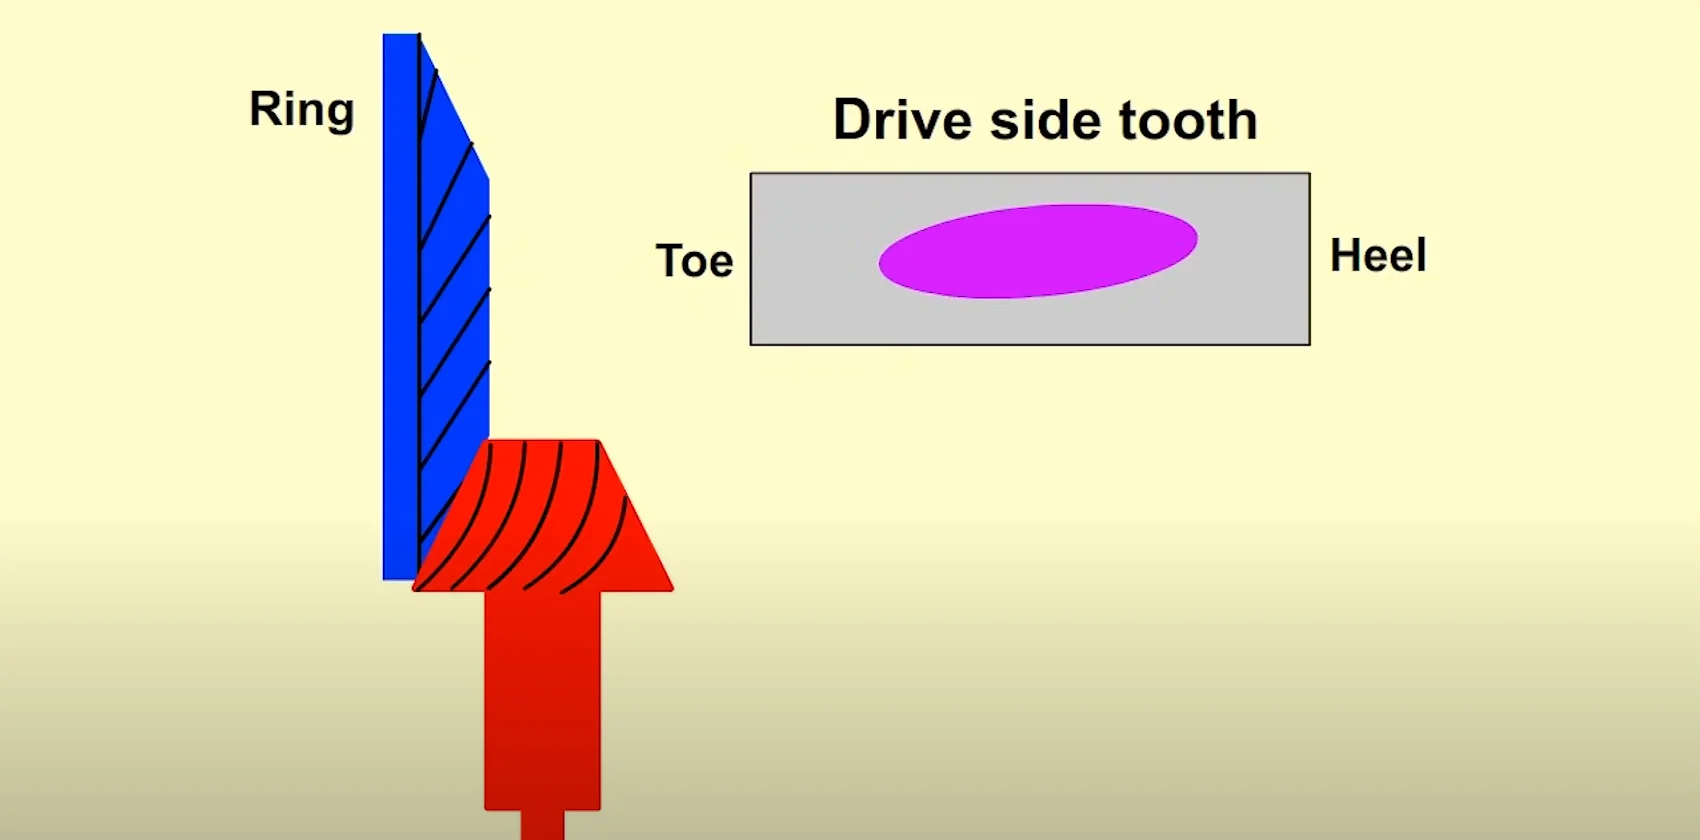
The gear contact pattern is the visual representation of how the pinion teeth mesh with the ring gear under rotation. It is the final verification of your setup and one of the best indicators of proper adjustment.
To Check:
- Apply a thin layer of gear marking compound to several teeth of the ring gear.
- Rotate the ring gear forward and backward several times under resistance (for example, by holding the pinion flange).
- Observe the pattern on both the drive and coast sides of the teeth.
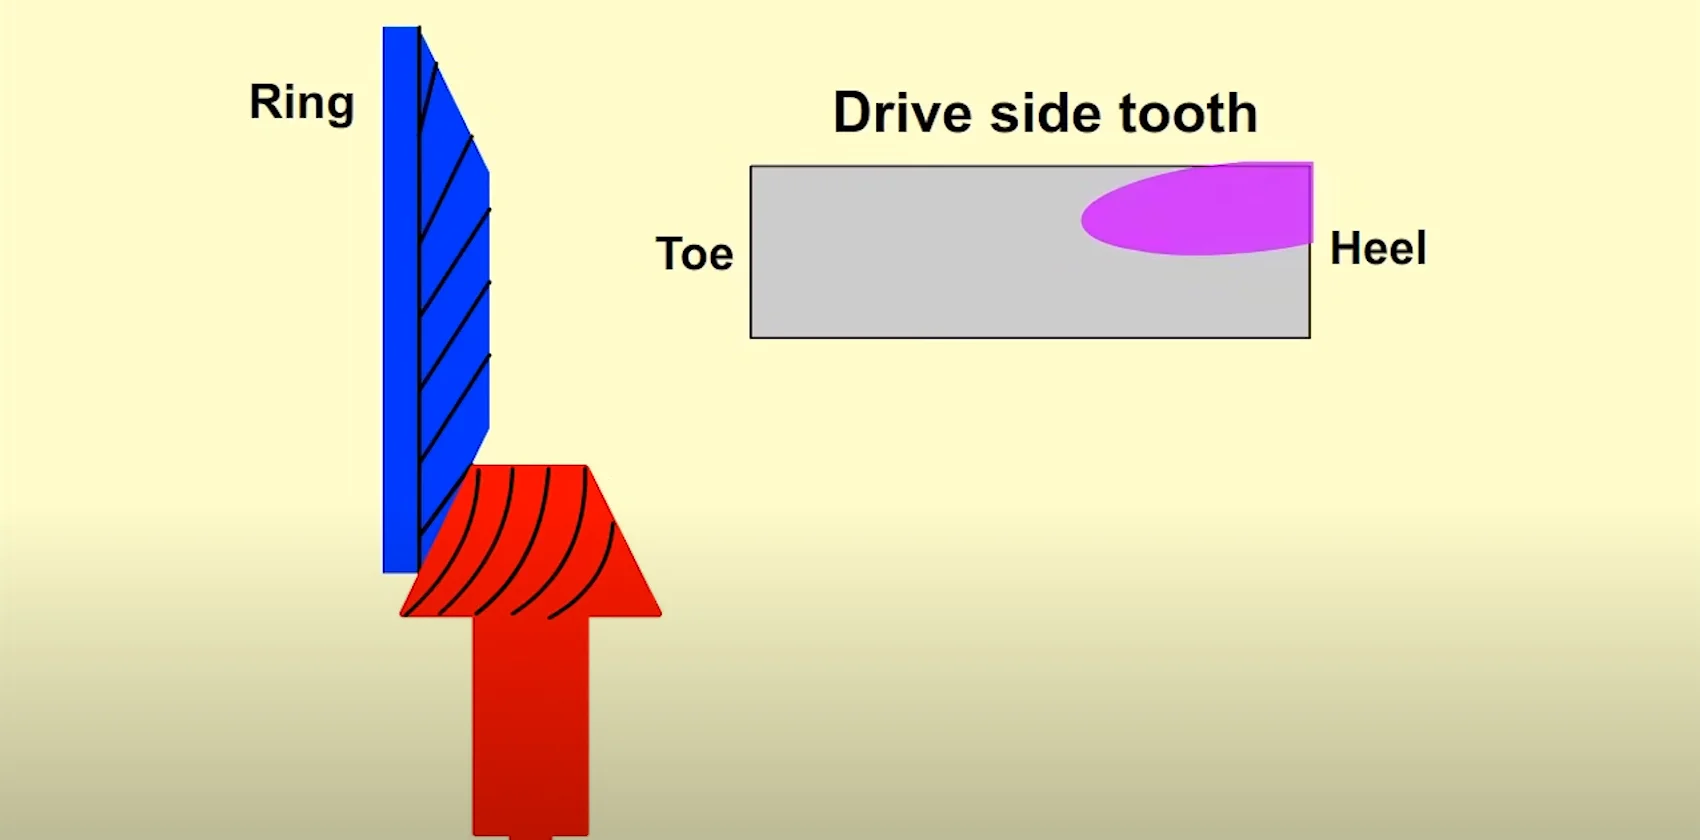
Reading the Pattern:
| Pattern Type | Description | Correction |
|---|---|---|
|
Centered, oval shape |
Ideal contact — depth and backlash correct |
No change |
|
Too deep (toward root) |
Pinion too close |
Add pinion shim |
|
Too shallow (toward face) |
Pinion too far |
Remove pinion shim |
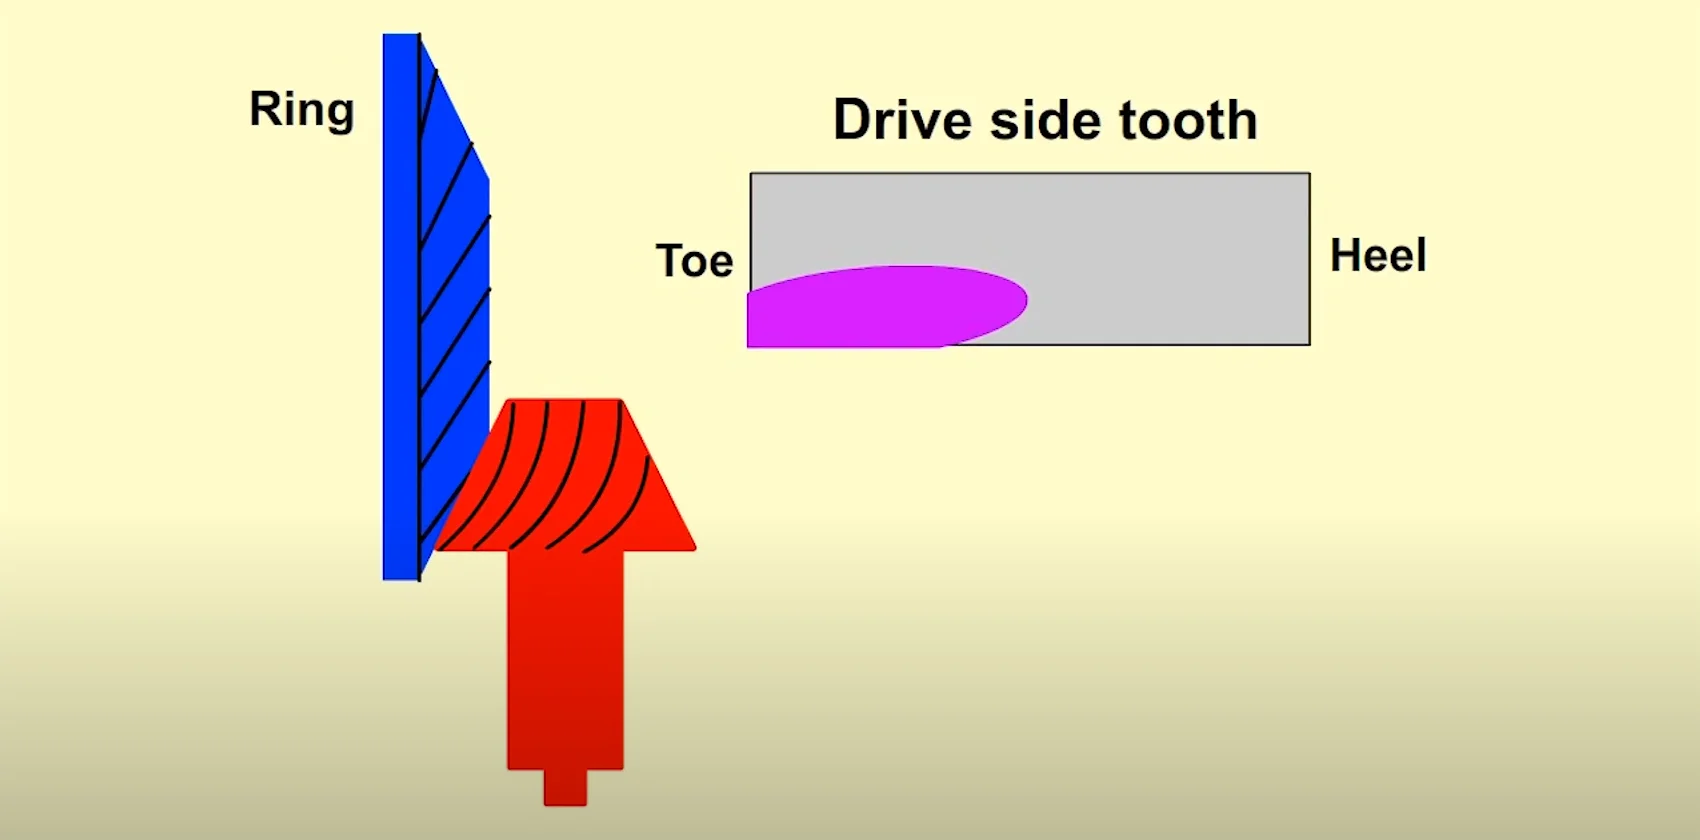
|
Toward toe |
Backlash too small |
Increase backlash |
|
Toward heel |
Backlash too large |
Decrease backlash |
Make small, controlled changes—each adjustment affects multiple parameters. Repeat until the contact pattern is symmetrical and centered.
Step 6: Final Assembly and Torque Verification
Once the pattern and backlash are correct, disassemble the setup and install all final bearings, seals, and crush sleeves as specified. Torque all fasteners to factory specifications, typically using thread-locking compound on critical bolts.
Recheck backlash after final assembly; it should remain within specification. If it changes significantly, the carrier preload or bearing seating may need correction.
Before sealing the differential cover, clean all mating surfaces and apply a quality gasket or RTV sealant. Fill the housing with the correct type and volume of gear oil recommended by the manufacturer.
Step 7: Break-In and Inspection
A new or adjusted ring and pinion set requires a short break-in period to ensure smooth operation and prevent premature wear.
Recommended steps:
- Run the vehicle for 15–20 minutes under light load.
- Allow the differential to cool completely before resuming use.
- Repeat this process two or three times during the first few hundred kilometers.
- After about 500 km, drain and replace the gear oil to remove initial metal particles.
During this phase, avoid heavy towing, racing, or high-speed driving. Proper break-in significantly extends the life of the gear set.
Common Adjustment Mistakes to Avoid
Even experienced mechanics can make errors when setting up ring and pinion gears. Avoid these frequent pitfalls:
- Skipping the setup bearings — using permanent bearings for initial fitting makes fine adjustments more difficult.
- Ignoring bearing preload — excessive free play or overtight torque leads to early failure.
- Using old shims — they may compress differently and cause unpredictable depth changes.
- Not verifying after final assembly — gear seating and torqueing can subtly shift dimensions.
- Overlooking the pattern — always rely on the contact pattern as the ultimate indicator of correctness.
Attention to these details separates a quiet, smooth differential from one that howls or fails prematurely.
Why Proper Adjustment Matters
A precisely adjusted ring and pinion gear set delivers several tangible benefits:
- Reduced drivetrain noise and vibration
- Improved torque transfer and mechanical efficiency
- Longer gear and bearing lifespan
- Lower operating temperatures
- Greater reliability under load
For performance vehicles, off-road trucks, and fleet applications, these differences are measurable in both durability and fuel efficiency. For manufacturers and suppliers, demonstrating accurate gear setup also reflects professional competence and product quality control.
Final Thoughts
Adjusting ring and pinion gears is both an art and a science. It requires patience, precision, and a solid understanding of mechanical geometry. Each adjustment step builds upon the previous one, so consistency and accuracy are vital.
Whether you are a professional builder or an enthusiast refining your differential setup, mastering this process ensures the best performance from your drivetrain. When done correctly, a well-set ring and pinion operate quietly, efficiently, and reliably for years—delivering the power exactly where it’s needed.
If you are looking for high-quality ring and pinion gear sets or need custom solutions for differential assembly, feel free to contact XJX Parts.
As a factory-direct supplier, we provide durable, precisely machined components designed to meet OEM standards and support bulk or wholesale orders worldwide.