Setting ring and pinion backlash is a critical step in building or rebuilding a differential. Get it wrong, and you risk premature gear wear, whining noises, or catastrophic failure. But get it right, and you’re rewarded with smooth, quiet operation and long-lasting gear performance. Whether you’re installing new gears in a street car, upgrading an off-road rig, or restoring a classic, this guide will walk you through the entire process.
What Is Ring and Pinion Backlash?
Backlash is the small gap between the teeth of the ring gear and the pinion gear. This clearance allows the gears to mesh without binding and provides room for lubrication. Measured in thousandths of an inch (typically .006” to .010” for most setups), proper backlash ensures that the gears run cool, quiet, and wear evenly.

Why Backlash Matters?
Too little backlash, and the gears may bind as they heat up and expand during operation. This leads to excessive friction, heat, and rapid wear. Too much backlash, and the gears will clatter, leading to noisy operation and increased shock loads. Either extreme shortens gear life and increases the risk of failure.
Tools You’ll Need
To properly set ring and pinion backlash, you’ll need:
- Dial indicator with magnetic base
- Gear marking compound
- Micrometer or calipers
- Torque wrench
- Bearing puller and press (for setup changes)
- Shop press (optional but helpful)
- Wrenches and sockets
- Carrier shims or adjusters (depending on the axle type)
Step-by-Step: Setting Backlash
The following steps will guide you through the process of dialing in backlash with precision, starting from the pinion gear installation.
1. Install the Pinion Gear
Start by pressing the bearing onto the pinion gear and installing it into the differential housing with the crush sleeve (or solid spacer), oil slinger, and seal in place. Torque the pinion nut to the specified preload.
2. Install the Carrier with Ring Gear
Mount the ring gear to the carrier using the correct torque sequence and specs. Use red thread locker on the bolts. Carefully place the carrier into the housing. If using shims, insert them on both sides. If using adjusters, thread them in evenly.
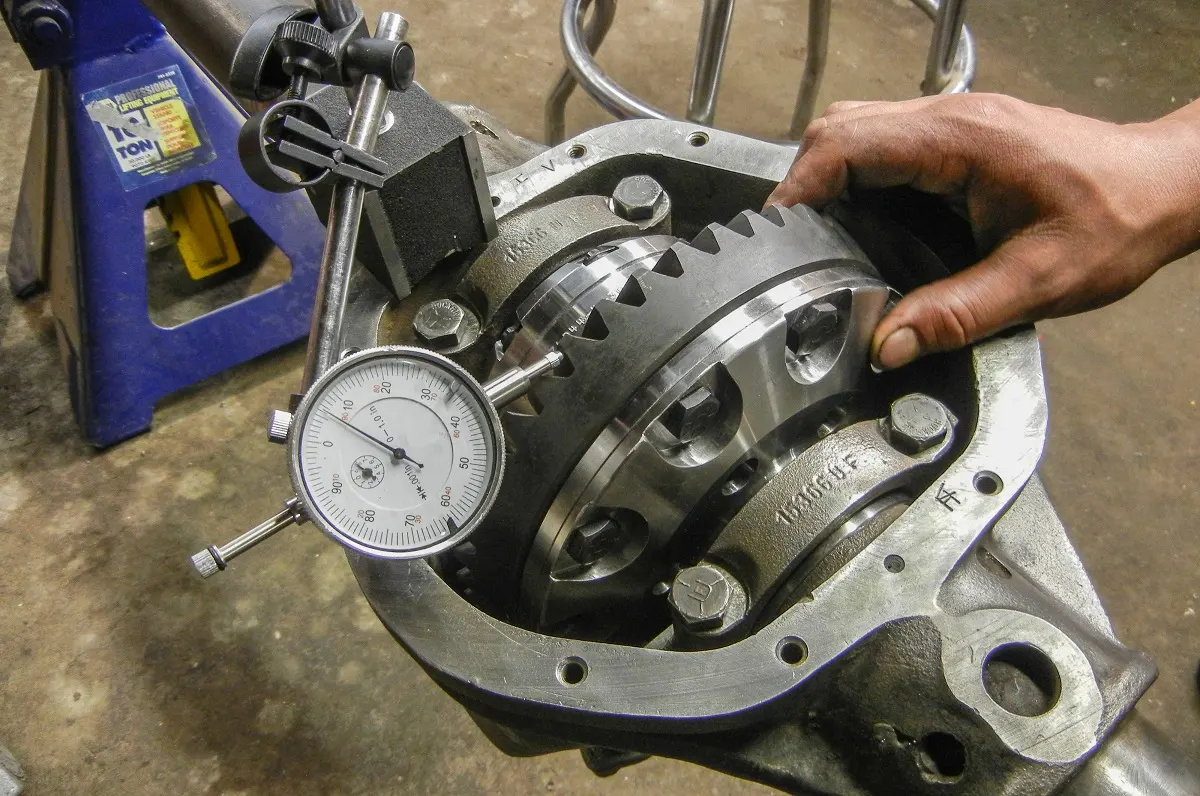
3. Set Initial Backlash
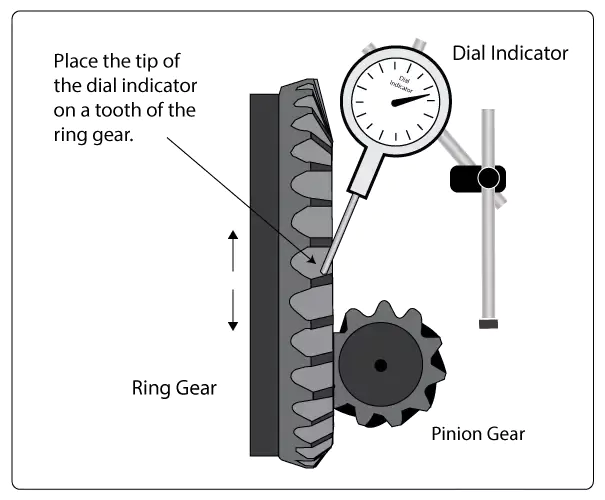
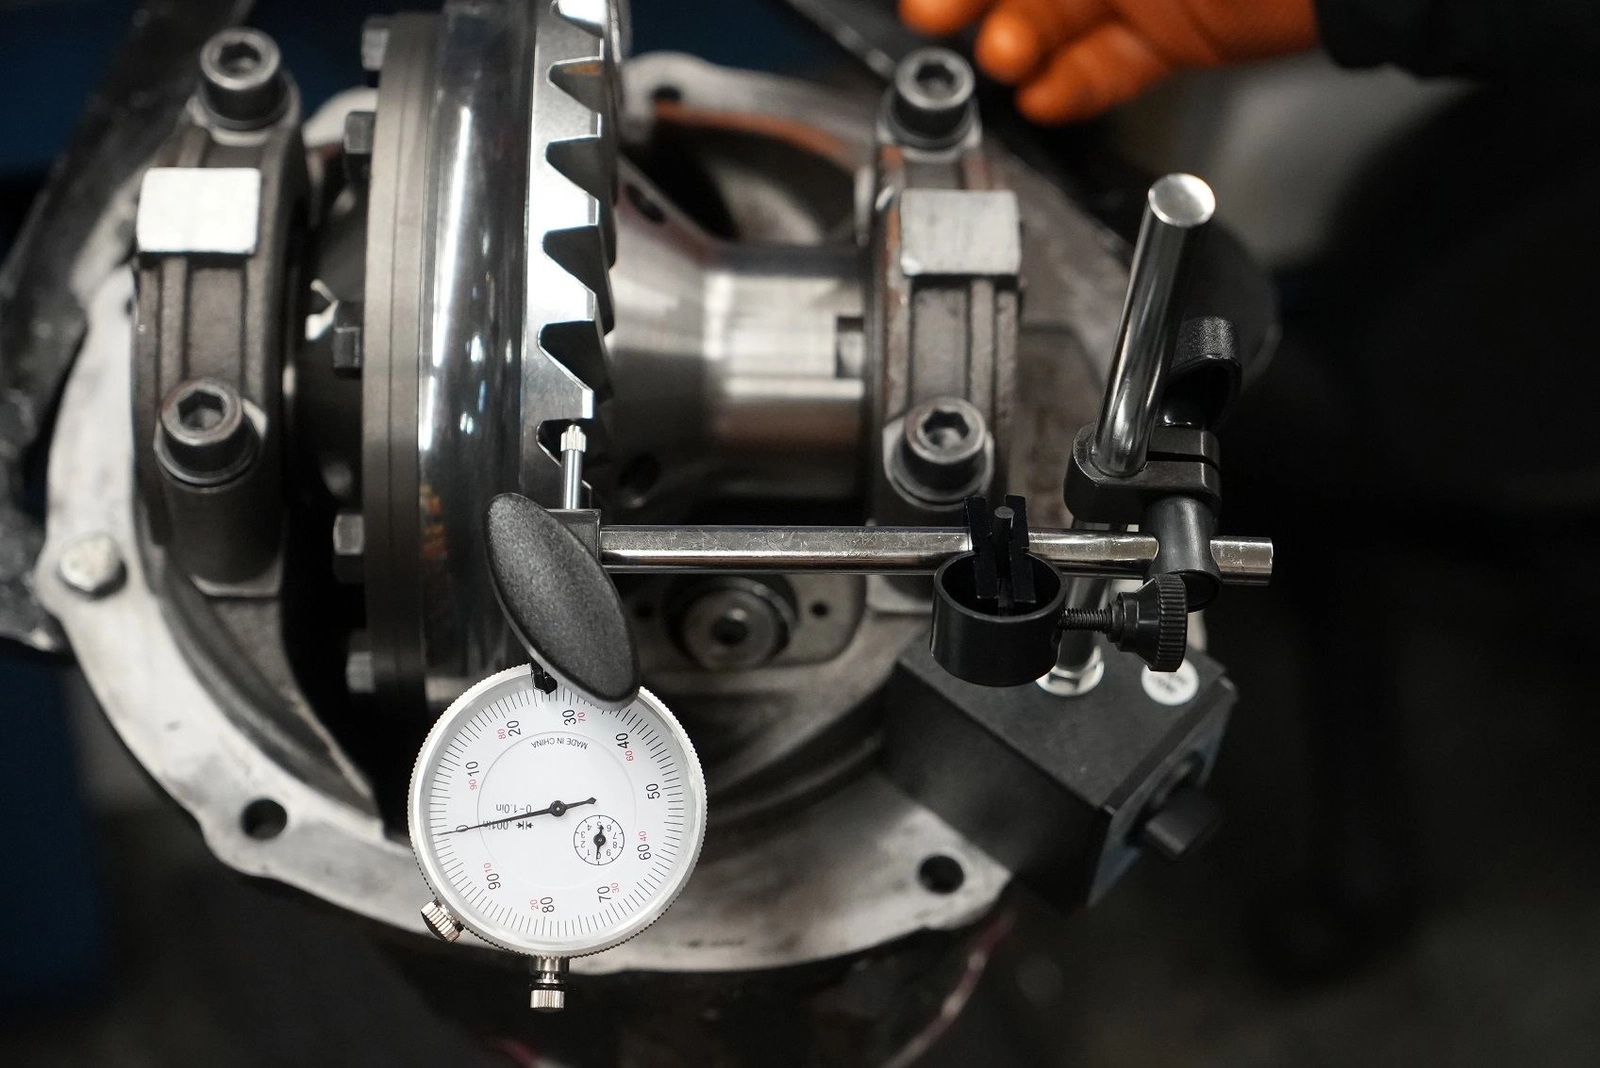
With the carrier installed and bearings preloaded, use a dial indicator to measure the backlash. Place the magnetic base on the housing and position the indicator tip on a ring gear tooth. Rock the ring gear back and forth and read the dial.
Aim for an initial reading within the factory spec, typically between .006” and .010”.
4. Adjust as Needed
If backlash is too tight or loose, you’ll need to shift the ring gear side-to-side.
To increase backlash: Move the ring gear away from the pinion (thicker shim on the ring gear side or tighter adjuster on the opposite side).
To decrease backlash: Move the ring gear closer to the pinion.
Always maintain bearing preload while adjusting backlash. This may mean adjusting both sides of the carrier equally but in opposite directions.
5. Check the Pattern
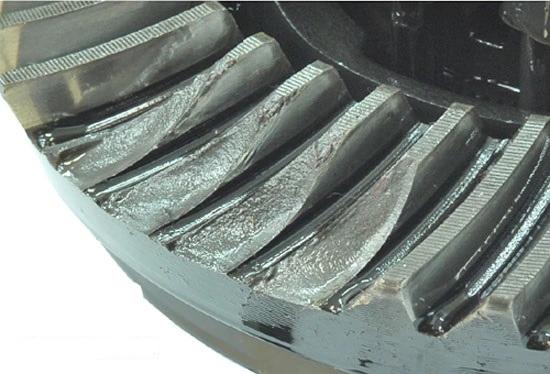
Apply gear marking compound to several ring gear teeth and rotate the assembly through a few full revolutions in both directions. Observe the pattern left by the pinion gear on the ring gear teeth.
A correct pattern will be centered on the tooth both face-to-flank and toe-to-heel. If the pattern is too deep or too shallow, adjust the pinion depth. Recheck backlash after every change.
6. Final Torque and Verification
Once you have acceptable backlash and a good gear pattern, torque everything to spec. Rotate the assembly several times to ensure smooth operation and recheck backlash to confirm it remains in spec.
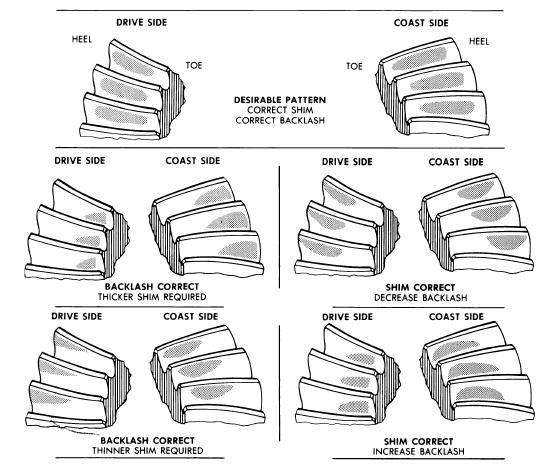
Understanding Gear Patterns
Reading gear tooth contact patterns is one of the most effective ways to diagnose setup issues. There are four main areas to observe:
- Toe: The end of the tooth closest to the center of the ring gear.
- Heel: The outermost end of the tooth.
- Face: The top surface of the gear tooth.
- Flank: The bottom surface of the gear tooth.
- Pattern too close to the face: Pinion is too deep.
- Pattern too close to the flank: Pinion is too shallow.
- Pattern too close to the heel or toe: Ring gear needs to be adjusted laterally.
Real-World Example: Dana 44 Axle
Let’s walk through a real-world example using a Dana 44 axle, popular in off-road and truck applications.
Factory spec for backlash on a Dana 44 is .006” to .010”. After installing the pinion and carrier with new bearings, a dial indicator shows .004” — too tight. To correct this, a .005” shim is removed from the ring gear side and added to the opposite side. After the adjustment, backlash measures .008” and the pattern is centered. Final torque is applied, and the setup is complete.
Common Mistakes to Avoid
- Skipping backlash checks: Always verify backlash before final assembly.
- Ignoring the pattern: Even if backlash is correct, a bad pattern means the setup is off.
- Over-tightening carrier caps: This can distort measurements.
- Using worn bearings for final setup: Always use new bearings or ones in excellent condition.
Tips for Success
- Take your time. Rushing leads to mistakes.
- Always use a dial indicator. Eyeballing or guessing isn’t accurate enough.
- Document your measurements. Keeping track helps you spot trends.
- If unsure, consult the manufacturer’s specs for your specific axle.
- Consider using setup bearings to simplify trial-and-error adjustments.
Troubleshooting Noises After Setup
After installation, if you hear whines, clunks, or hums while driving, it’s worth revisiting the differential setup:
- Whine under acceleration: Backlash is too tight or pinion depth is incorrect.
- Whine during deceleration: Backlash is too loose or pinion depth is shallow.
- Clunk when shifting or taking off: Excessive backlash.
When to Recheck Backlash
Backlash should be rechecked:
- After final assembly, before adding gear oil
- After initial break-in period (usually around 500 miles)
- If you hear unusual noises or feel vibrations
Maintenance and Longevity
Once backlash is properly set, the differential requires little maintenance. Use the correct gear oil recommended by your axle or vehicle manufacturer, and replace it at regular intervals. Avoid heavy towing or high loads during the break-in period to allow gears to seat properly.
Check fluid condition periodically. Milky oil or metal shavings indicate water ingress or gear wear — both reasons to inspect backlash and gear pattern again.
Final Thoughts
Setting ring and pinion backlash isn’t black magic, but it does require precision, patience, and attention to detail. The good news? Once you’ve done it properly, your differential is set for thousands of trouble-free miles. Take your time, follow the process, and you’ll get professional-level results in your own garage.
Now that you know how to set ring and pinion backlash, you’re well on your way to building a reliable and quiet drivetrain that’s ready to handle the road, trail, or track.