When it comes to upgrading or modifying your 4×4 driveline, enthusiasts often face a common question: “What should be installed first—SYE, ring and pinion gears, lockers, or shafts?” Understanding the logical sequence is crucial not only for ease of installation but also for ensuring longevity, proper performance, and avoiding unnecessary labor. In this guide, we break down the installation order and explain why each step matters, focusing on real-world applications for off-road vehicles, trucks, and SUVs.
Understanding the Components
Before diving into installation sequence, it is important to understand what each component does and how it interacts with the rest of the driveline.
1. Slip Yoke Eliminator (SYE)
The Slip Yoke Eliminator (SYE) is a modification primarily used in vehicles with long-travel suspension or lifted suspensions. It replaces the factory slip yoke and allows the use of a fixed-length driveshaft, improving driveline angles and reducing vibration. Installing a SYE often requires modifications to the driveshaft and sometimes the pinion angle of the differential.
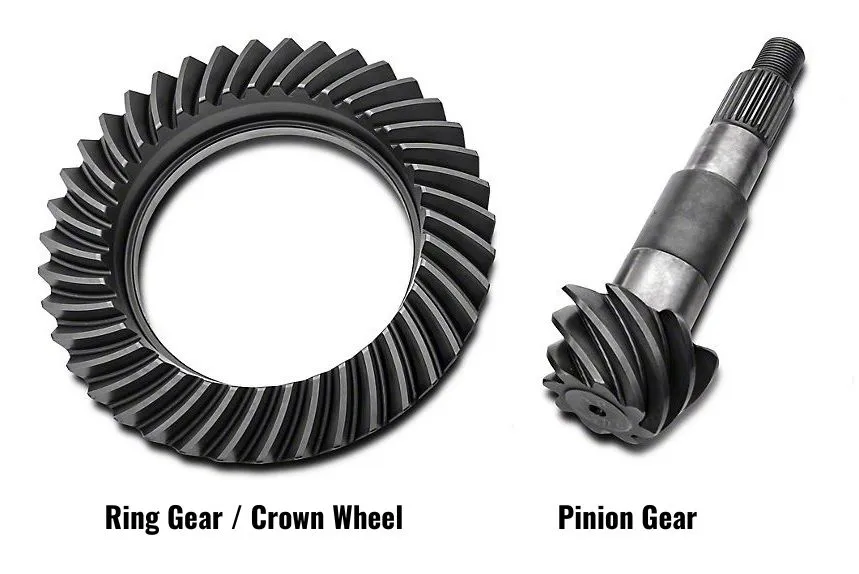
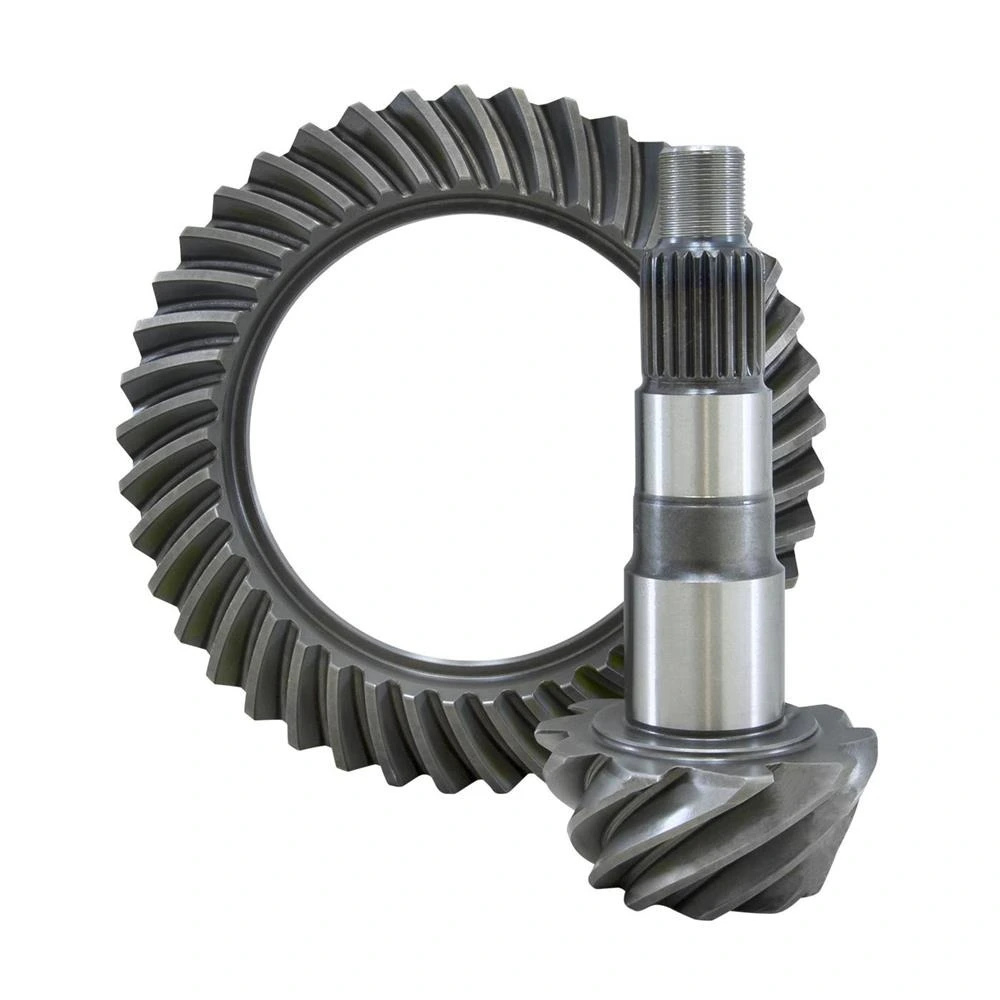
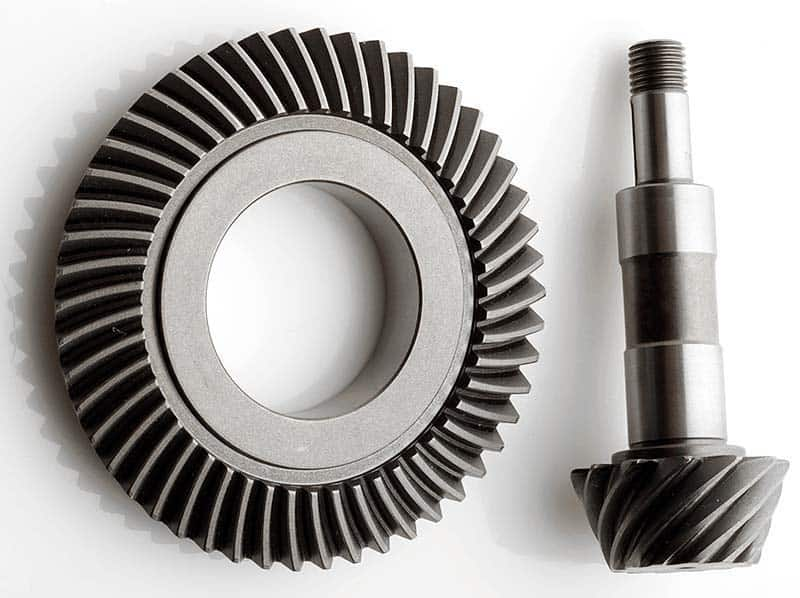
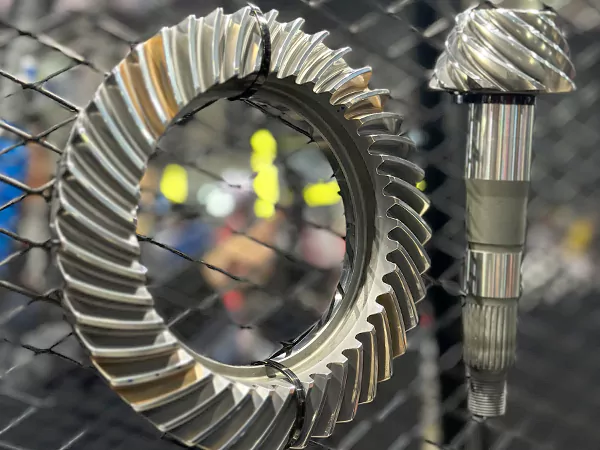
2. Ring and Pinion Gears
Ring and pinion gears are the core components of your vehicle’s differential. They determine the final drive ratio and directly affect torque delivery to your wheels. Upgrading or replacing these gears often involves disassembling the differential housing, and proper installation is critical to avoid premature wear, noise, or failure.
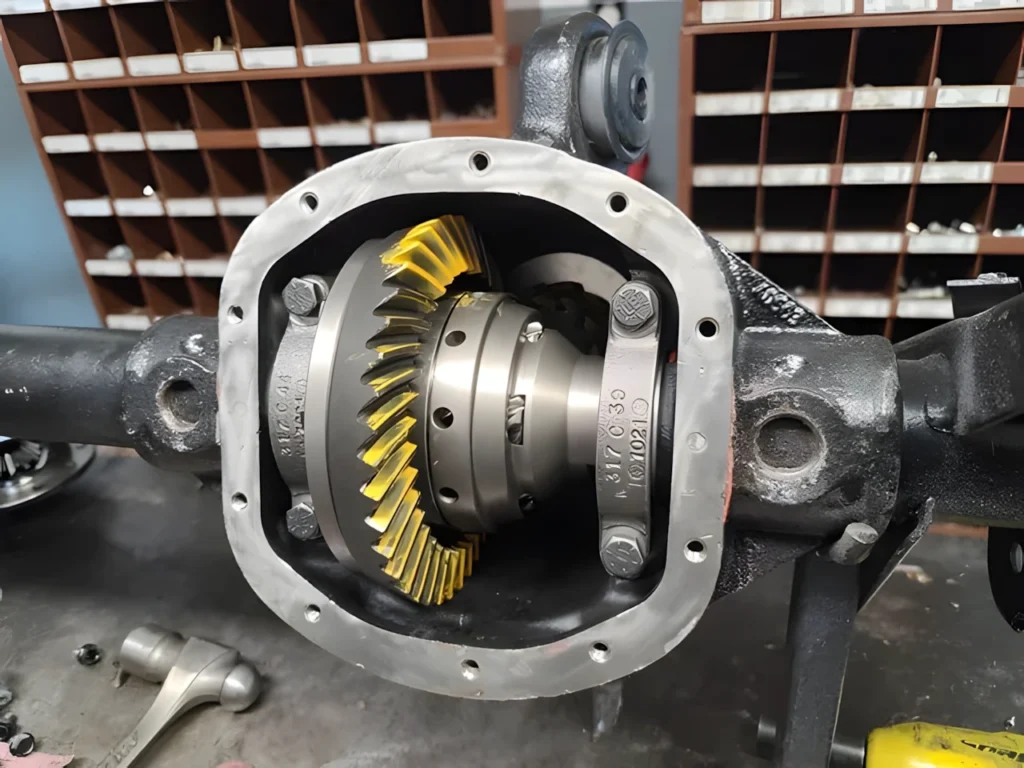
3. Lockers
Lockers, whether automatic or selectable, provide improved traction by locking the differential. They are installed inside the differential carrier and interact with the ring and pinion gears. A properly installed locker enhances off-road performance, but incorrect installation can damage the gears or carrier.
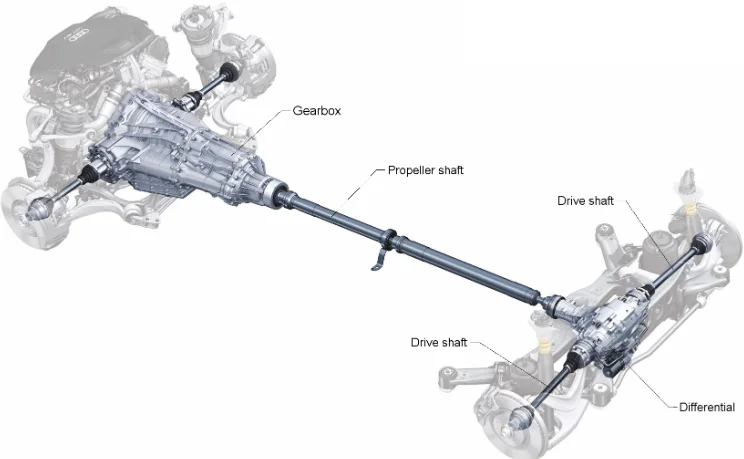
4. Shafts (Drive Shafts / Axle Shafts)
The drive shafts transmit power from the transfer case to the axles, while axle shafts transmit power from the differential to the wheels. Installing shafts requires proper alignment and fitment, which depends on the pinion angle and differential assembly being correctly set up.
Why Installation Order Matters
Improper installation order can lead to several issues:
- Rework and extra labor: Installing components out of sequence may require disassembly of already installed parts.
- Component damage: Incorrect pinion angles or misaligned ring and pinion gears can lead to abnormal wear or failure.
- Vibration and driveline issues: The SYE and drive shafts are sensitive to angles; installing them before the differential is properly set up can create vibration problems.
- Safety concerns: Misaligned lockers or poorly installed axle shafts may fail under torque, risking damage to the vehicle or injury.
Given these risks, following a logical installation sequence ensures efficiency, reliability, and optimal performance.
Recommended Installation Sequence
When performing driveline upgrades, following the correct installation sequence is critical for both performance and longevity. Improper sequencing can lead to excessive wear, vibration issues, and even component failure. The following installation order is widely recommended by experienced off-road enthusiasts, 4×4 mechanics, and professional installers.
1. Ring and Pinion Gears
Why ring and pinion gears come first:
- Achieves correct gear mesh pattern, ensuring smooth power transfer and minimal wear.
- Allows accurate setting of backlash and pinion depth without interference from other components.
- Prepares the differential for locker installation and ensures compatibility with upgraded shafts or SYE modifications.
Tips for installation:
- Inspect carrier bearings and replace if necessary; worn bearings can cause uneven gear wear and noise.
- Use high-precision shims and measurement tools to set backlash and pinion depth. Even minor deviations can lead to premature gear failure.
- Double-check that the gear ratio matches your planned upgrade. Mismatched ratios can affect transfer case function, speedometer accuracy, and driveline angles.
- Rotate the gears by hand after installation to ensure smooth engagement before moving to the next step.
2. Lockers
Once the ring and pinion gears are properly installed, the next step is installing the lockers. Lockers are designed to enhance traction by mechanically locking the differential under specific conditions. Their performance is directly dependent on correct gear alignment, making the installation sequence crucial.
- Lockers depend on the precise mesh of ring and pinion gears for smooth operation.
- Installing lockers first can prevent proper gear adjustment, leading to binding or abnormal wear.
- Some lockers may require minor modifications to the differential carrier or gear setup, which is easier to perform after the gears are in place.
- Verify that the locker is compatible with your ring and pinion gear ratio; incompatibility can cause differential failure or noise.
- Follow the manufacturer’s guidelines for preload, bearing torque, and installation procedures.
- Rotate the differential carrier after installation to ensure the locker engages smoothly and without interference.
- Avoid forcing components into place, as improper seating can damage both the locker and the ring and pinion gears.
3. SYE (Slip Yoke Eliminator)
With the differential and lockers installed, the SYE (Slip Yoke Eliminator) should be installed. The SYE is crucial for vehicles with lifted suspensions or long-travel driveline setups, as it replaces the factory slip yoke with a fixed-length driveshaft connection. Correct installation ensures proper pinion angle, reduced vibration, and improved driveline reliability.
- Installing SYE first can complicate pinion angle adjustments, leading to vibration or premature driveshaft wear.
-
The SYE must align with the differential’s output, which depends on the ring and pinion gears and locker configuration.
-
Ensures proper fitment of a fixed-length drive shaft, preventing binding or interference with suspension movement.
- Use an angle gauge to measure and adjust the pinion angle accurately. A few degrees of misalignment can significantly increase vibration.
- Confirm that the driveshaft and universal joints are compatible with the SYE output flange.
- Apply high-quality grease to splines and torque all bolts to the manufacturer’s specifications to prevent loosening during operation.
- After installation, rotate the driveshaft and check for smooth operation under simulated load or suspension articulation.
4. Shafts (Drive Shafts / Axle Shafts)
The final step in the sequence is installing the shafts, which includes both the main drive shaft connecting the transfer case to the SYE and the axle shafts connecting the differential to the wheels. Installing shafts last ensures alignment and compatibility with all previously installed components.
- Proper alignment with differential output and pinion angle is critical.
- Avoids binding or vibration that can occur if shafts are installed before final gear and SYE adjustments.
- Ensures compatibility with suspension lifts or modifications, which may affect driveshaft length or angle.
- Check u-joint orientation and phasing to prevent vibration issues.
- Ensure all splines are clean and lubricated before assembly to facilitate smooth rotation and prevent premature wear.
-
Tighten all fasteners to the recommended torque specifications; loose hardware can damage components or cause safety hazards.
-
After installation, inspect the driveline while the vehicle is under load or during suspension articulation to confirm proper operation.
Common Mistakes to Avoid
- Skipping gear setup: Installing lockers or SYE before properly setting ring and pinion gears leads to misalignment.
- Incorrect pinion angle: SYE installation without checking angles can cause vibration.
- Forcing incompatible lockers: Some lockers require specific clearance; forcing them can damage the differential.
- Neglecting lubrication: Failing to pre-fill or properly lubricate differential components can result in premature wear.
- Ignoring suspension modifications: Lifted suspensions may require longer shafts or modified angles—plan ahead.
Additional Considerations
- Vehicle-specific instructions: Always consult manuals or manufacturer guidelines. Some vehicles have unique tolerances or assembly steps.
- Torque specifications: Use factory torque settings for all fasteners to avoid damage.
- Break-in procedure: New ring and pinion gears, lockers, and bearings often require a break-in period to ensure longevity.
- Quality components: Investing in high-quality ring and pinion gears, lockers, and shafts reduces future maintenance and improves performance.
Benefits of Following the Correct Sequence
By installing components in the proper order—ring and pinion gears, lockers, SYE, and shafts—vehicle owners can enjoy:
- Smooth, reliable driveline operation
- Reduced installation time and effort
- Minimized risk of component damage
- Enhanced off-road performance and traction
- Long-term durability and fewer maintenance headaches
Conclusion
Understanding the installation sequence of SYE, ring and pinion gears, lockers, and shafts is not just a technical detail—it is a critical factor in the reliability and performance of your driveline. Starting with the foundation components like ring and pinion gears ensures proper gear mesh and carrier setup, followed by lockers, SYE, and finally shafts to maintain alignment and reduce vibration. By following this logical order, off-road enthusiasts and professionals alike can achieve optimal performance, avoid unnecessary labor, and ensure the longevity of their upgrades.
Proper planning, precise installation, and attention to detail make all the difference when upgrading a 4×4 vehicle. Whether you are lifting your truck, enhancing traction, or replacing worn components, adhering to this sequence will save time, protect expensive parts, and maximize the performance benefits of your modifications.