This comprehensive guide will walk you through the entire process of diagnosing the leak, gathering the right tools, and executing a professional-grade repair. By the end, you’ll have the confidence to tackle this fix and protect the heart of your drivetrain.
Section 1: Diagnosis, Tools, and Safety First
Confirming the Source of the Leak
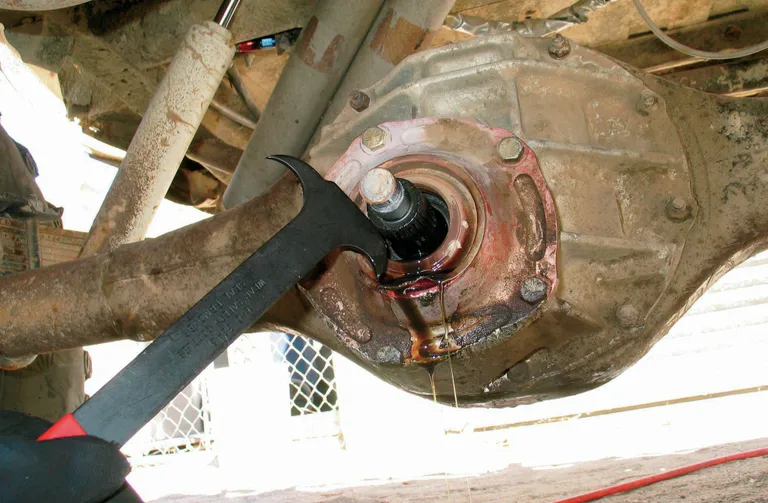
Gear oil leaks can sometimes migrate. Before you condemn the pinion seal, clean the differential housing thoroughly and observe.
- Pinion Seal Leak: The oil will be concentrated directly around the area where the driveshaft flange/yoke enters the differential housing.
- Differential Cover Leak: Oil will weep from the seam around the differential cover plate.
- Axle Seal Leak: Oil will travel along the axle tubes and may be visible near the wheels.
If the oil is concentrated at the driveshaft-to-housing junction, you have confirmed your target.
Essential Tools and Materials Checklist
| Tool/Material | Purpose | Notes |
|---|---|---|
|
Safety Glasses & Gloves |
Crucial for protection. |
Gear oil is thick and pungent. |
|
Jack Stands & Floor Jack |
Safely lifting and supporting the vehicle. |
Never work under a car supported only by a jack. |
|
Wrenches & Sockets |
For various bolt sizes (driveshaft, pinion nut). |
Typically metric or standard, depending on the vehicle. |
|
Pinion Flange/Yoke Holder |
Prevents the yoke from turning when removing/installing the pinion nut. |
Essential specialized tool. |
|
Torque Wrench |
Non-negotiable. Required for setting the crucial pinion nut torque. |
Must be able to measure high torque specs. |
|
Seal Puller or Large Flathead Screwdriver |
To pry the old seal out. |
Be careful not to scratch the housing. |
|
New Pinion Seal |
The replacement part. |
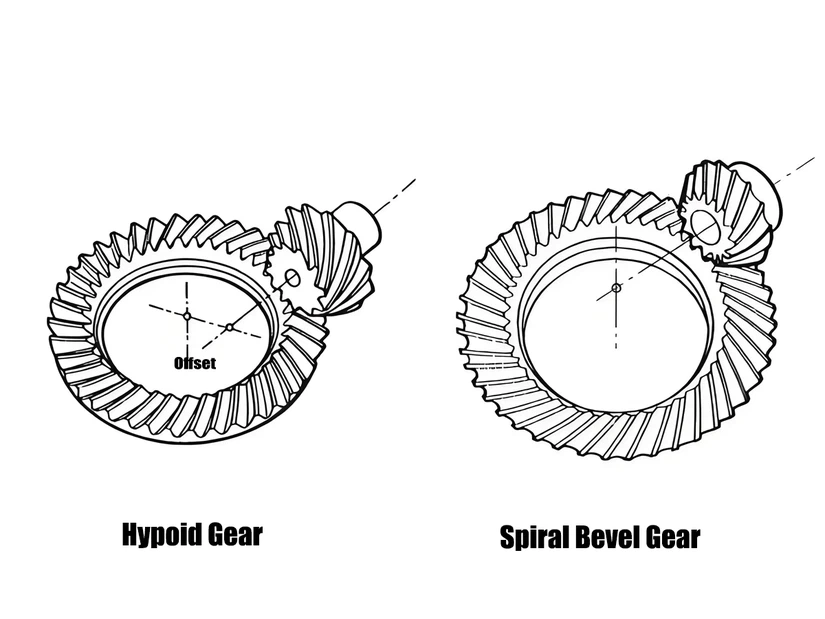
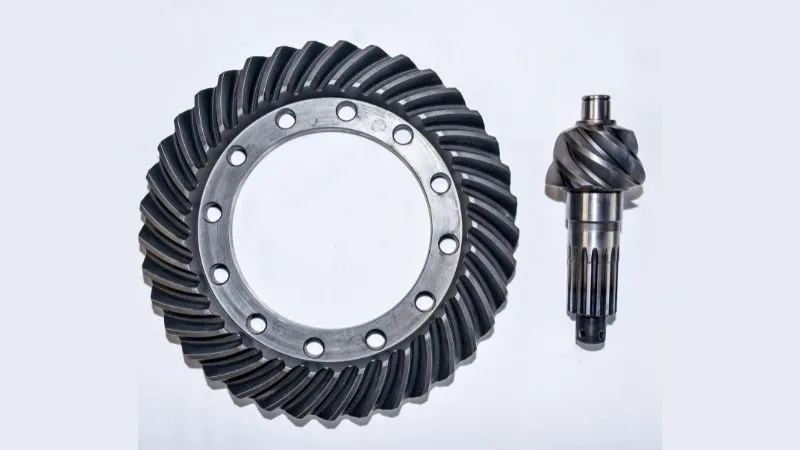
Ensure it matches your differential make and model (e.g., Dana 60, Ford 8.8). |
|
New Pinion Nut (Recommended) |
Pinion nuts are often one-time-use (staked or locking). |
Check your vehicle’s service manual. |
|
Gear Oil |
To top off or fully replace the lost fluid. |
Have a sufficient quantity on hand. |
Section 2: The Critical Measurement—Tension is Everything
Marking the Pinion Nut and Yoke (Crush Sleeve Systems)
- The Problem: Most modern differentials use a crush sleeve (or collapsible spacer) that is crushed during the initial assembly to set the preload. If you over-torque the nut, you further crush the sleeve, creating excessive preload and destroying the bearings.
- The Pre-emptive Mark: Before loosening anything, use a chisel, paint marker, or scratch awl to create alignment marks across the pinion nut, the yoke, and the pinion shaft itself. The goal is to return the nut to the exact position it was in before removal.
- Recording Torque/Rotation (Recommended Method): A more accurate method is to measure the rotational torque (pinion preload) before disassembly using a specialized inch-pound beam or dial torque wrench. You must aim to return to this exact value. Check your repair manual for the specific procedure.
Section 3: Step-by-Step Pinion Seal Replacement
With your marks made and tools ready, it’s time to get to work.
Remove the Driveshaft
- Chock the Wheels: Ensure the vehicle is secure and place chocks on the front wheels.
- Locate U-Joint: Mark the driveshaft-to-yoke connection point to ensure it is reinstalled in the original, balanced orientation.
- Unbolt and Remove: Remove the U-joint strap bolts and carefully lower the driveshaft. Tie it up and out of the way to prevent damage to the U-joints.
Remove the Pinion Nut and Yoke
- Hold the Yoke: Use your specialized pinion flange holder tool to prevent the yoke from rotating.
- Remove the Pinion Nut: Use a large socket and breaker bar to remove the pinion nut. If reusing the old nut (not recommended), be extra careful to note its threads.
- Slide Off the Yoke: The yoke should slide off the splines of the pinion shaft easily. If it is stubborn, use a harmonic balancer puller or a similar puller tool. Be careful not to damage the threads.
Remove and Replace the Seal
- Pry Out the Old Seal: Using the seal puller or a large, flathead screwdriver, carefully position the tool between the seal body and the differential housing. CRITICAL: Avoid gouging or scratching the soft aluminum or cast iron housing bore where the seal sits. Scratches here will cause the new seal to leak immediately.
- Clean the Housing: Wipe the seal bore clean of old oil and debris. Inspect the area for any imperfections.
- Install the New Seal:
- Apply a thin film of gear oil or sealant to the outer edge of the new seal. This helps it slide in and seal against the housing.
- Place the new seal squarely in the bore.
- Use a large socket, a specialized seal driver, or the old seal (placed backwards) as a drift to gently tap the new seal into place. It must sit perfectly flush with the housing face.
Reinstall the Yoke and Pinion Nut
- Inspect the Yoke: Before reinstallation, inspect the sealing surface (the smooth collar) on the yoke where the seal rides. If this area is grooved, scratched, or pitted, you must replace the yoke or install a repair sleeve. A damaged yoke will destroy your new seal instantly.
- Install the Yoke: Slide the yoke back onto the pinion shaft splines.
- The Critical Torque Step:
- Hand-tighten the new pinion nut.
- Use the flange holder to keep the yoke still.
- Option A (Marked System): Slowly and carefully tighten the nut back to your pre-marked alignment position. Stop exactly at the line.
- Option B (Preload System): Tighten the nut until you achieve the exact inch-pound rotational preload reading you measured in Section 2. Stop immediately when this number is reached. Do not over-torque.
Section 4: Final Steps and Fluid Top-Off
- Reinstall the Driveshaft: Align the marks you made earlier and bolt the driveshaft back onto the yoke using the appropriate torque for the straps. This maintains the driveshaft’s factory balance.
- Check and Fill Gear Oil: Remove the differential fill plug. Using a fluid pump, check the fluid level. In most applications, the oil should be filled to the bottom edge of the fill plug opening. Use the recommended GL-5 gear oil for your specific axle.
- Test Drive and Inspection: Take the vehicle for a short, gentle drive. Immediately after, check the area for leaks. A proper repair should be completely dry. Recheck the fluid level after the first few days of driving.
By taking the time to follow this detailed procedure, paying close attention to the critical pinion nut torque, you have successfully fixed your leaking pinion seal, restored your differential’s lubrication, and ensured the longevity of your drivetrain.
For professional workshops and dedicated automotive enthusiasts, having reliable, high-quality differential components is essential for a lasting repair. From durable seals to premium-grade ring and pinion gears for any application, our factory is dedicated to performance and precision. If you are looking for parts that meet or exceed OEM specifications, please feel free to contact us at XJXPARTS to discuss your needs.