If you’ve recently upgraded your Toyota Hilux with larger tires or use your vehicle for towing, overlanding, or off-roading, you may have noticed a loss of low-end torque and inaccurate speedometer readings. One of the most effective ways to restore drivability and performance is to re-gear the differential. In this detailed guide, we’ll walk through the process of replacing the rear differential gears on a Toyota Hilux, swapping the stock 5.6 gears with performance-focused 4.11 gear sets from XJX Parts.
This process involves technical steps and requires mechanical precision. If you have access to the right tools and experience with drivetrain components, this guide will help you understand how to complete the replacement properly.
Why Re-Gearing Matters for the Toyota Hilux
Toyota Hilux trucks are built tough, but when modifications like oversized tires are added, the factory gear ratios are no longer ideal. Larger tires effectively raise your gear ratio, which can cause your vehicle to feel sluggish off the line and decrease fuel efficiency. Re-gearing corrects this by matching the gear ratio to your tire size and driving demands.
Swapping to a 4.11 gear ratio with components from XJX Parts offers a balance of improved low-speed torque and highway drivability. This change is especially beneficial for vehicles used in hilly terrain, towing, or any application where low-end power is crucial.
Tools and Equipment Required
To begin the rear differential re-gearing process, make sure you have the following:
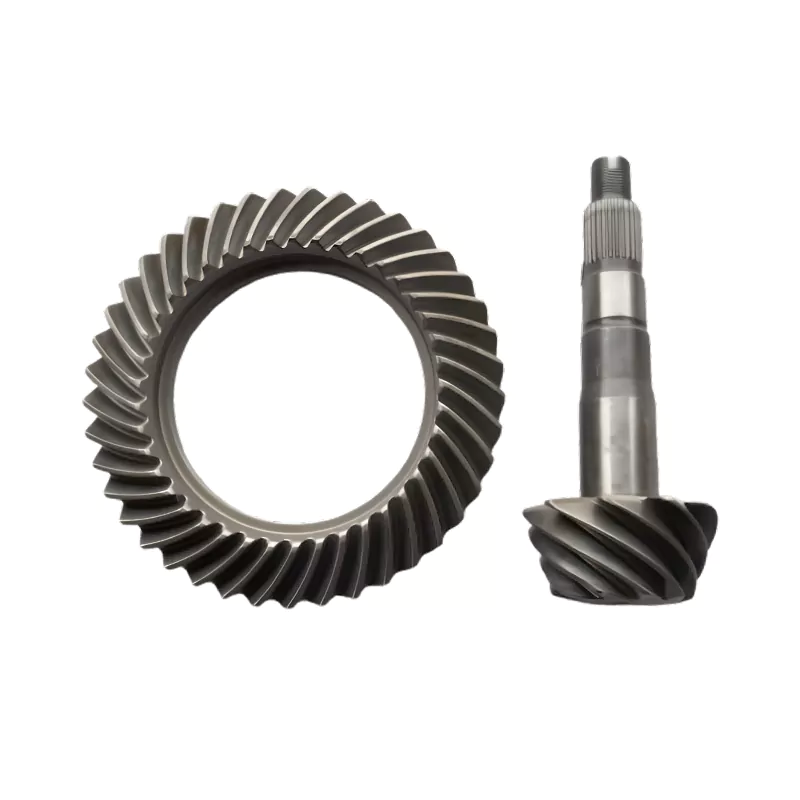
- XJX Parts 4.11 ring and pinion gear set
- Complete bearing and shim kit
- Torque wrench
- Dial indicator with magnetic base
- Bearing puller and press
- Marking compound (gear marking paint)
- Setup bearings (optional but recommended)
- Shop press
- Gear oil and gasket maker or new gasket
Step-by-Step Rear Diff Gear Replacement
1. Preparation and Safety
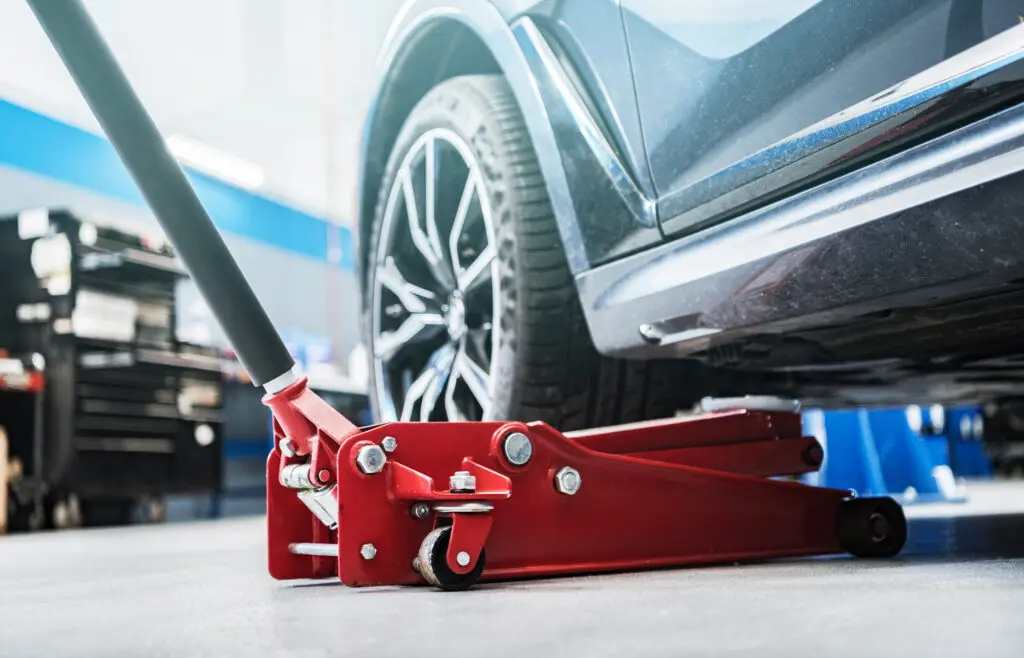
Start by parking the Hilux on a flat, level surface. Engage the parking brake and chock the front wheels for added safety. Raise the rear of the vehicle using a hydraulic jack and secure it with jack stands under the axle housing. Remove both rear wheels for better access to the differential.
Next, place a drain pan underneath the differential and remove the drain plug (if equipped) or loosen the bottom bolts of the diff cover to drain the fluid. Let it fully drain before proceeding.
2. Remove the Axles and Differential Cover
Remove the brake calipers and set them aside (do not let them hang by the hoses). Take out the brake rotors to access the axle retainer bolts. Remove the bolts and carefully slide the axle shafts out from both sides.
Now remove the bolts securing the differential cover. If the cover is stuck, use a soft mallet or putty knife to gently break the seal. Drain any remaining oil and clean the housing surface thoroughly.
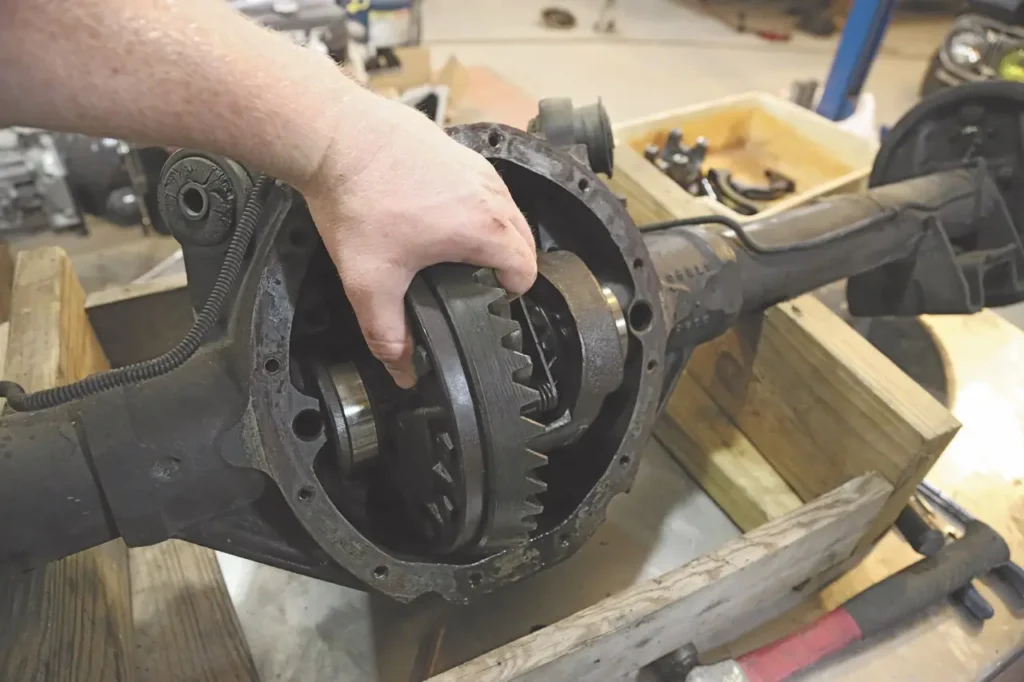
3. Take Out the Differential Carrier
With the axles out of the way, you’ll see the carrier assembly inside the housing. Use a paint marker to label the bearing caps for left and right orientation—this step is critical for proper reassembly. Unbolt the caps and carefully remove the carrier. It may require a pry bar if it’s seated tightly.
Place the carrier on a clean workbench and inspect the condition of the ring gear, bearings, and bearing races.
4. Remove the Ring Gear and Bearings
Secure the carrier in a vise or press and remove the bolts holding the ring gear to the carrier. If needed, tap the gear off evenly using a soft hammer. Pull the carrier bearings off with a bearing puller, being careful not to damage the shims underneath.
Organize and label all shims so they can be referenced during reassembly. Clean all components with brake cleaner or degreaser.
5. Remove the Pinion Gear
On the rear side of the diff housing, unbolt the pinion flange nut and remove the yoke. Tap the pinion gear out through the housing using a rubber mallet or brass punch. Take out the outer bearing, crush sleeve (if applicable), and any pinion shims.
Thoroughly clean the inside of the housing, especially around the pinion bearing seats and oil channels. Inspect the pinion seal and replace it if needed.
6. Prepare the New Gears
Slide setup bearings onto the new XJX Parts pinion gear. Begin with the original shim for reference, then insert the pinion into the housing. Install the outer bearing and yoke by hand, tightening it just enough to remove play without fully crushing the sleeve.
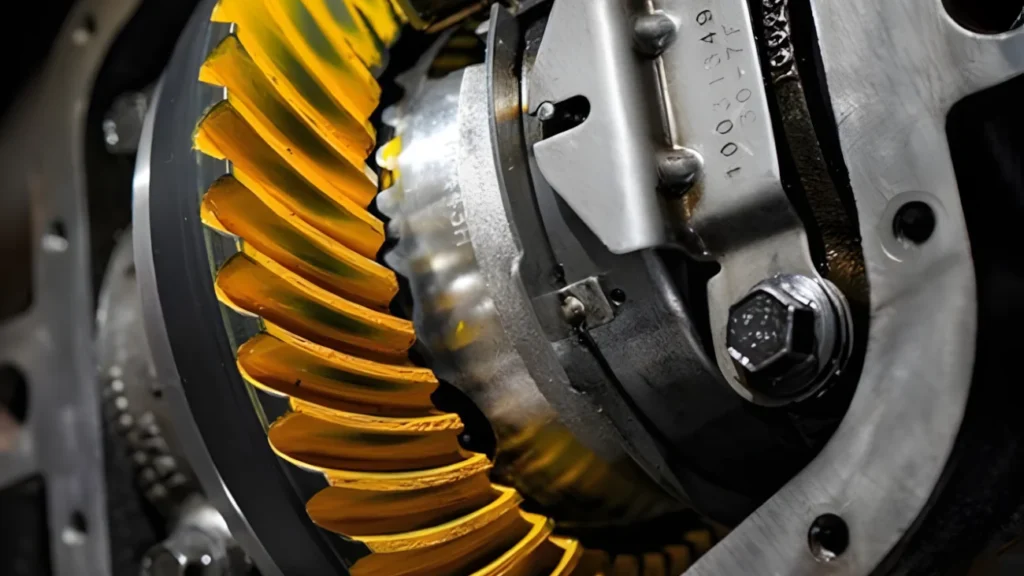
Now mount the new ring gear from XJX Parts to the carrier. Align the bolt holes carefully and torque the ring gear bolts in a crisscross pattern to the manufacturer’s spec. Be sure to apply thread locker for added security.
Reinsert the carrier into the housing with the ring gear loosely in place. Do not torque the bearing caps yet. This allows you to check for gear mesh and backlash.
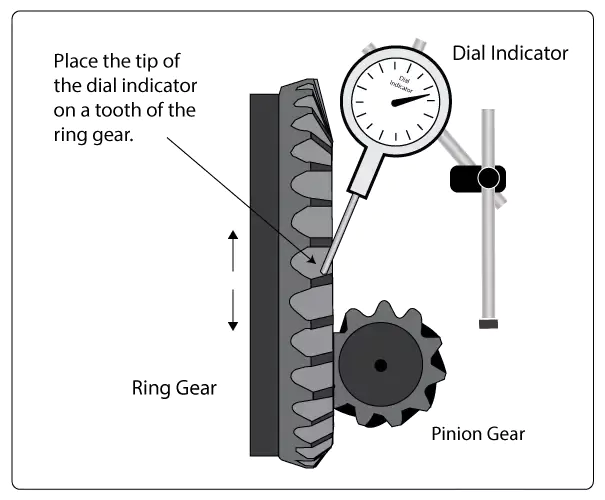
7. Check Backlash and Gear Contact Pattern
Set up a dial indicator on the ring gear’s teeth to measure backlash. The desired clearance usually falls between 0.13 mm and 0.18 mm. Adjust the side shims or adjusters until the backlash falls within this range.
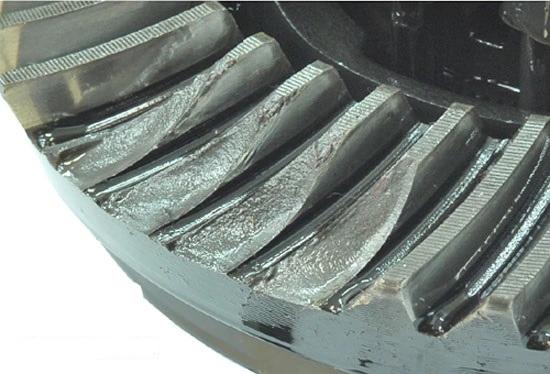
Apply gear marking compound to several ring gear teeth. Rotate the ring gear back and forth while applying light resistance to the pinion. Observe the contact pattern to verify correct pinion depth and gear engagement.
A proper pattern will be centered across the face and from heel to toe of the ring gear tooth. If the pattern is too high, low, or skewed, adjust the pinion shim and retry until the pattern is optimal.
8. Final Assembly
Once satisfied with the test setup, disassemble the components. Press the final bearings onto the pinion and carrier using a hydraulic press. Install a new crush sleeve or preload shim.
Reassemble the pinion into the housing, torque the yoke nut to set proper preload (check with an inch-pound torque wrench), and secure with thread locker.
Install the carrier with the proper shims or preload adjusters, torque the bearing caps to spec, and verify backlash again. Paint the gears one final time and confirm the contact pattern remains consistent.
9. Reinstall Axles and Seal the Housing
Slide the axle shafts back into place, ensuring they seat properly into the carrier. Reinstall axle retainers, brake rotors, and calipers.
Clean the housing surface and differential cover thoroughly. Apply a bead of RTV sealant or use a new gasket. Reinstall the cover, torque the bolts evenly, and refill with the correct amount and grade of gear oil as specified by Toyota.
Double-check all fasteners, rotate the tires by hand, and listen for any abnormal noises. After confirming everything is secure, reinstall the wheels, lower the vehicle, and prepare for the break-in process.
Break-In Procedure
To ensure long-term performance and reliability, allow the gears to break in properly. Avoid heavy towing or high-speed driving for the first 80–100 kilometers. Drive gently, and let the differential cool between drives to reduce heat buildup.
Benefits of XJX Parts Gear Sets
XJX Parts gear sets are engineered for precision, durability, and performance. Manufactured using high-quality materials and heat-treated for strength, these gears deliver smoother operation and long-term dependability, whether you’re on the highway or tackling rough terrain.
Unlike many generic replacements, XJX Parts gears are developed with a focus on OEM-level fitment and optimized performance. Backed by rigorous quality checks, they’re ideal for Hilux owners looking to restore lost power and drivability after tire upgrades or load increases.
Final Thoughts
Replacing the rear differential gears on a Toyota Hilux is a demanding task, but with the right tools and parts, it’s a highly rewarding upgrade. Matching your gear ratio to your tire size ensures better acceleration, improved fuel economy, and overall drivability.
Choosing XJX Parts for your gear upgrade provides added confidence, thanks to their commitment to quality and engineering precision. If you’re unsure about tackling the job yourself, consult with a drivetrain specialist or local installation partner.
For those who are mechanically inclined, this project is a great way to enhance your Hilux’s performance and tailor it to your specific driving needs. Take your time, double-check your setup, and enjoy the improved driving experience once your new gears are broken in.
Need help selecting the right gear ratio or components for your Hilux?
Reach out to the team at XJX Parts for personalized support and expert recommendations tailored to your build and driving style.